Build
Having selected a design and layout, it’s time to build it.
Sand Biofilters
The sand biofilter is the core of the iAVs design, so let’s get started there.
Effective drainage is essential in a sandgarden and here are your options.
Let’s now consider how to put various iAVs designs together.
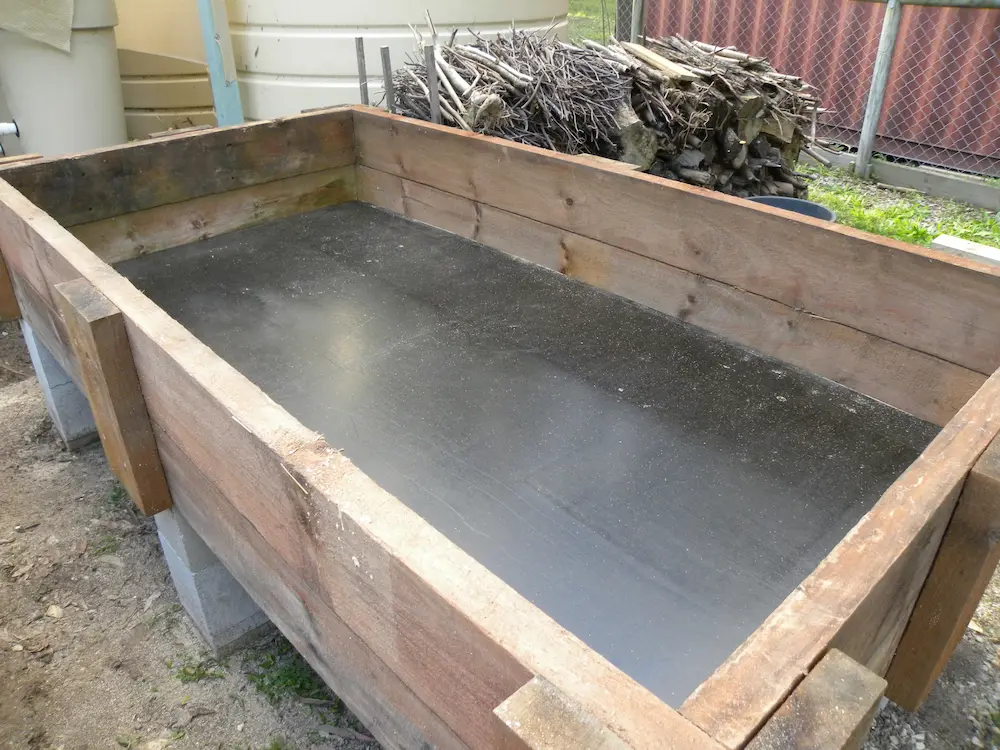
Building the Square Metre Sand Bio-filter
I chose plywood and timber for my square meter bed…because that’s what I had most readily available to me. I could have just as easily – and for less money – built the containment out of treated pine sleepers.
This option is robust and resists termites – very useful in my subtropical climate.
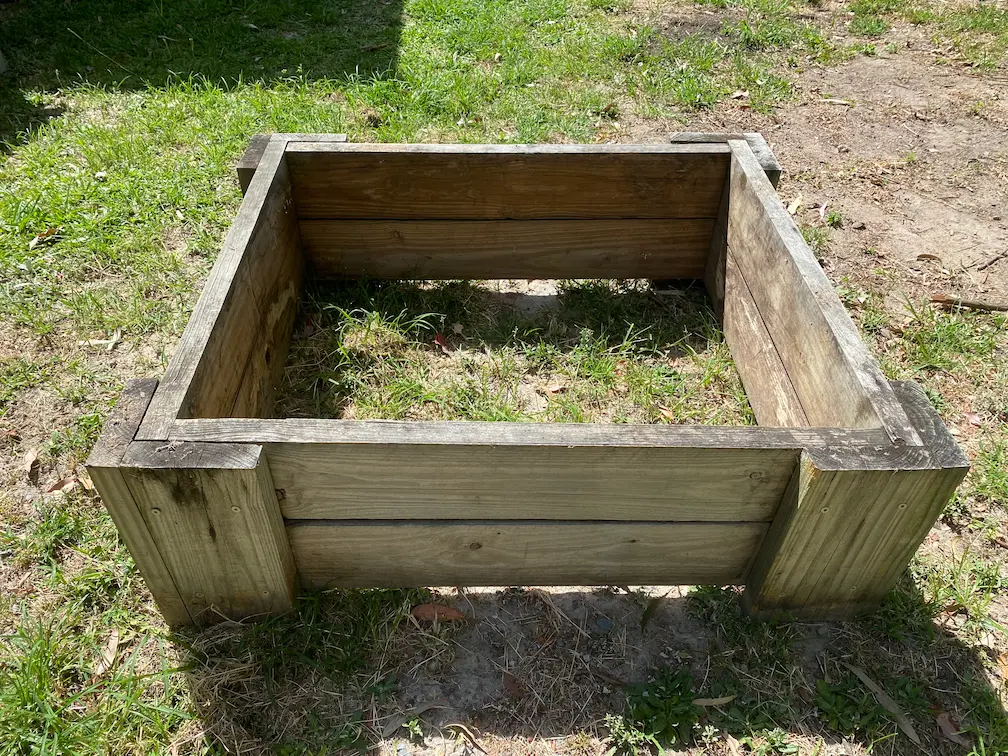
In any case, here’s how I assembled this little unit.
Building the Starter iAVs
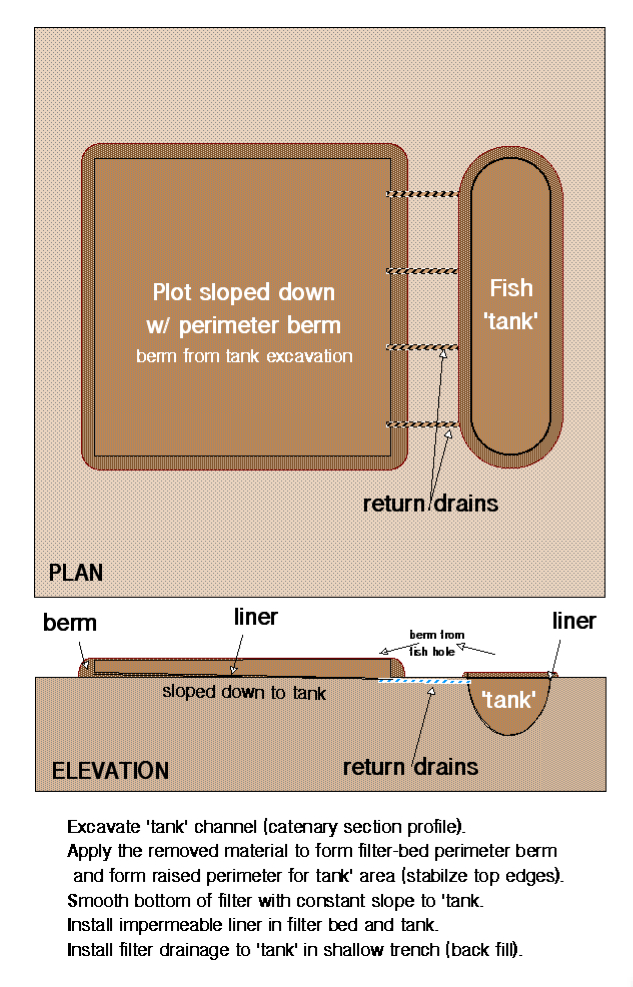
Create the fish tank
The first test of a fish tank design is that it holds water. The second test is its effectiveness in the removal of metabolic wastes produced by the fish.
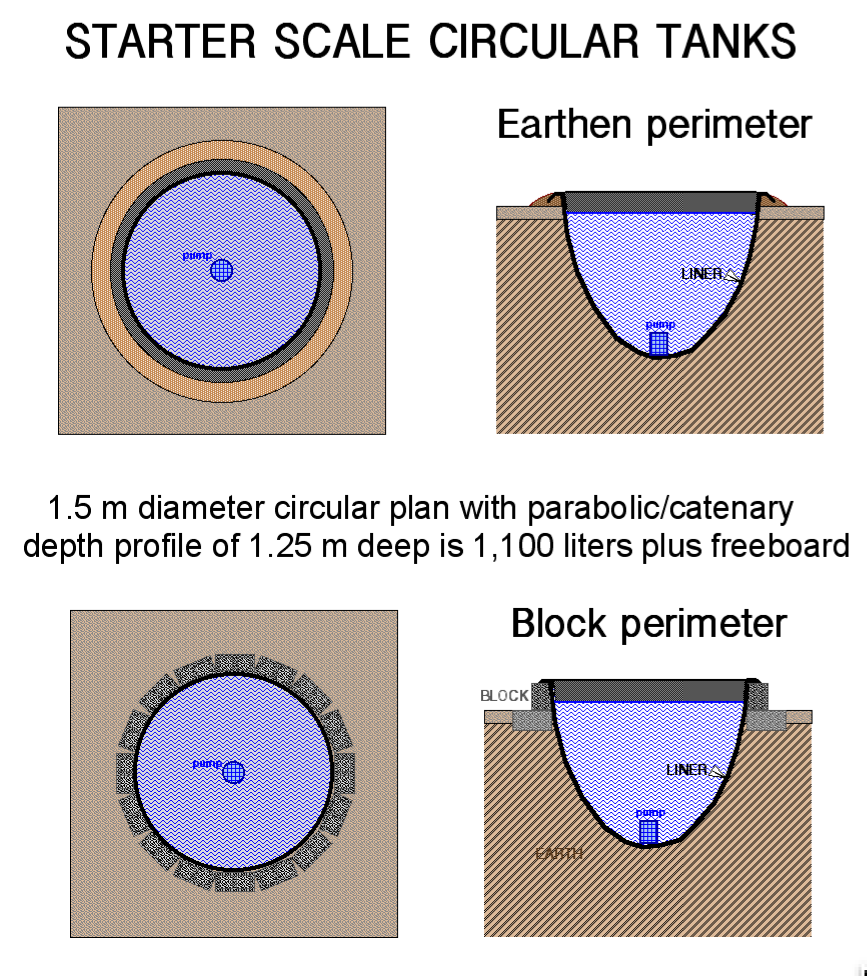
The simplest and most cost-effective way to create a fish tank that meets these ends is to dig a round hole shaped like a catenary – a curve formed by a chain hanging freely from two points that are not in the same vertical line.
When you know the distance between the anchor points – and the depth from the line between the anchor points to the bottom of the curve – you can calculate the volume of a circular tank.

Building the fish tank of this shape increases the stability of side walls making them less likely to collapse – and it concentrates the solids toward the centre of the low point (and lowest volume region) – by gravity – for ease of removal by the pump.
The tank will have a diameter of 1.5 metres and a depth of 1.2 metres…and it will hold around 1100 litres of water.
The other option is to create a fish tank that is shaped like a rectangle with rounded short ends.
This tank is 2 metres long and one metre wide with a catenary depth of 1.2 metres – and a capacity of around 1200 litres.
The bottom and sides of this tank are the same catenary shape that we used on the round tank.
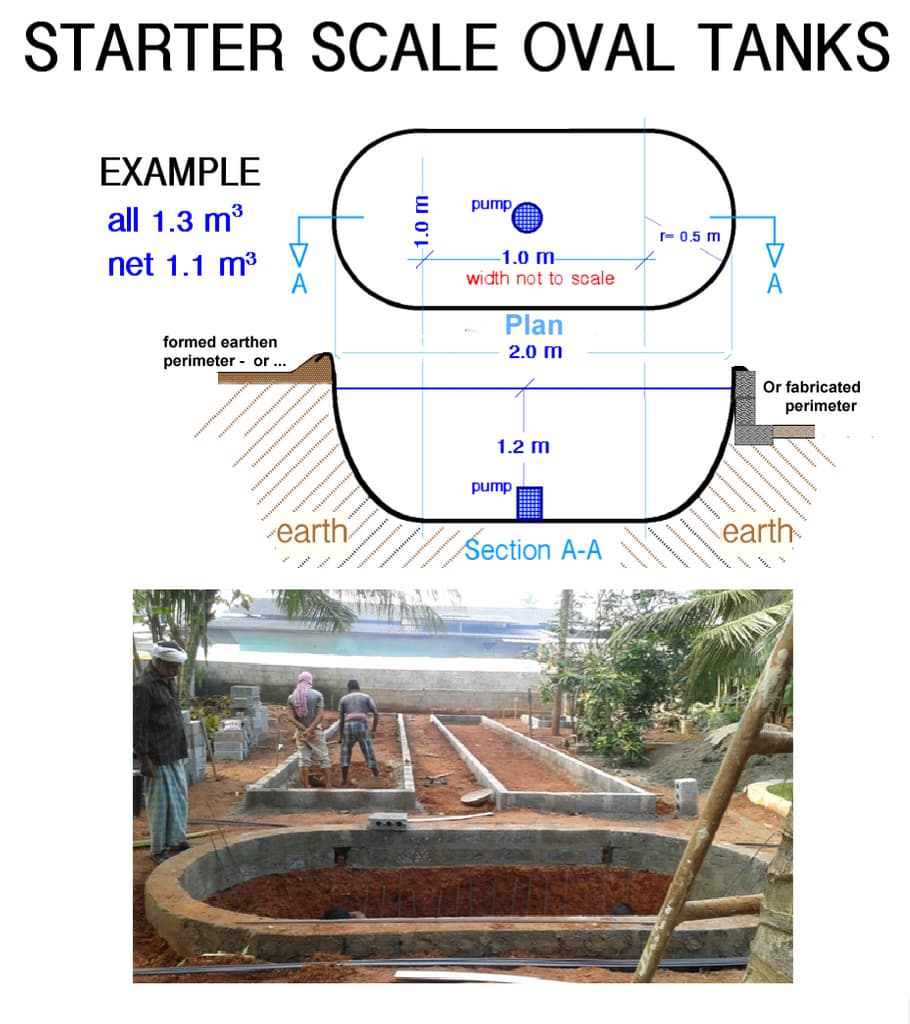
The catenary shape eliminates dead zones in corners and, when air stones are used along the edges of the long axis, they will vertically mix/turn over the water and create a pair of elliptical currents that concentrate the solids toward the pump or uptake manifold.
The more that the shape and currents can be employed to focus wastes for ease of extraction, the better.
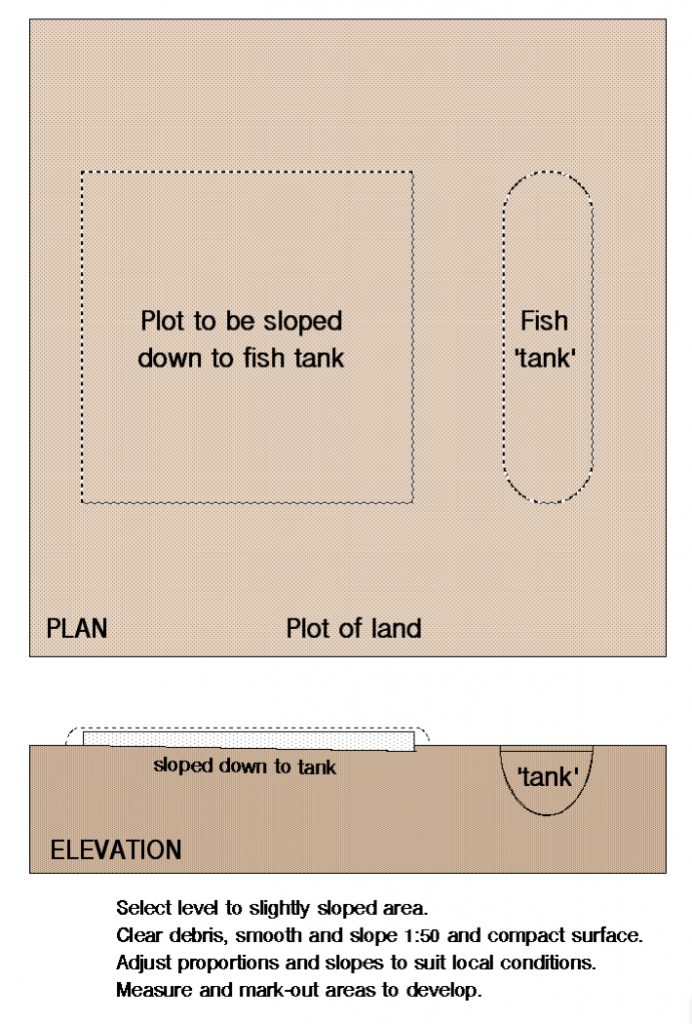
Spread the soil that has been removed from the hole around the perimeter of the sand bed. Arrange the soil that comes out of the hole around the sand bed perimeter.
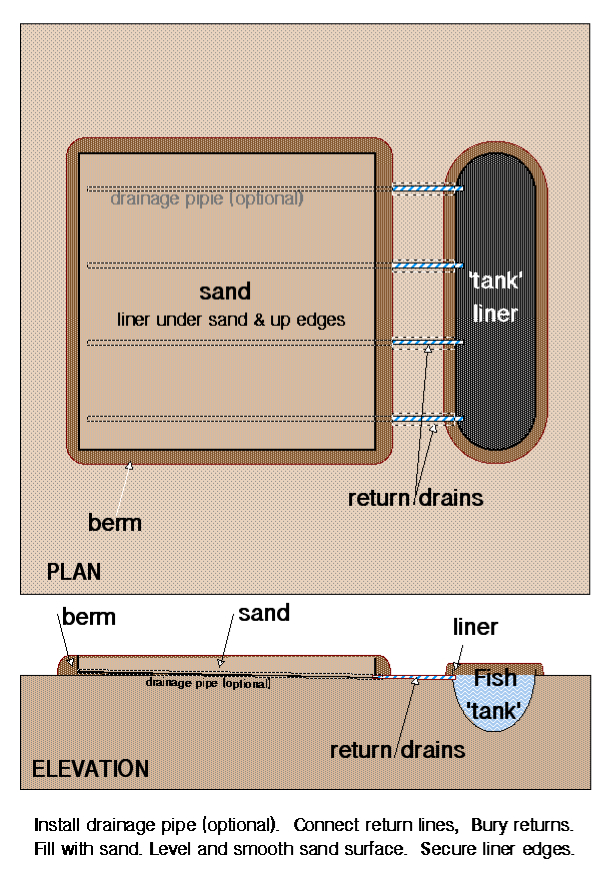
Place the liner centrally over the hole and gently ease it into the hole – adding about 50 litres of water to pin the liner in place while you pleat the short edges to conform to the curved ends. Once you have everything done to your satisfaction, fill the fish tank with clean water. It will hold 1000 litres of water – and will weigh a metric ton.
Give the tank a few days to settle and then secure the liner edges permanently. Paving stones will serve for this purpose.
This is the easiest and most cost-effective way to build an iAVs fish tank. Period!
There are alternatives, but they will be no more efficient – and will cost you more. Some alternatives are better than others.
If an in-ground catenary-shaped tank is not appropriate for you, the next best option is a circular tank with a gentle slope to a central low point at the bottom of the tank.
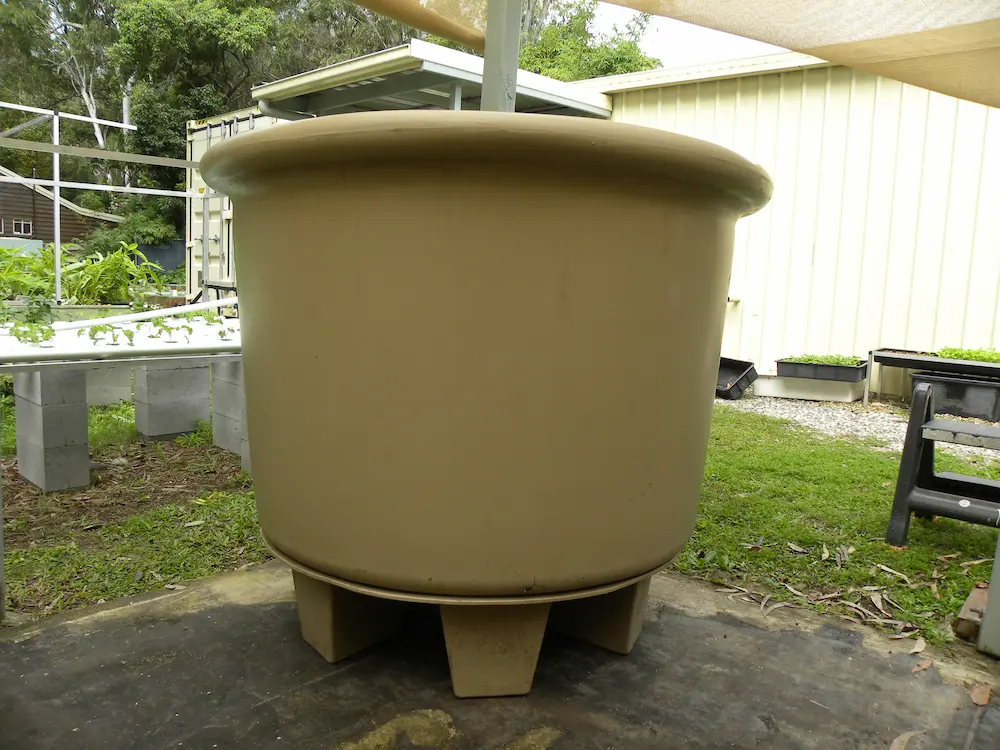
The next preferred fish tank is a circular tank with a flat bottom that is clear of structural elements. They are still expensive and they require a little more thought when setting up. They come in all sizes – from a couple of hundred litres up to 10,000 litres and beyond.
If you must, you can use a square tank but choose one with rounded corners. Rectangular tanks are at the bottom of my list.
Note: Both square and rectangular tank shapes can be made better by digging a depression in the bottom of the tank – like a shallow catenary.
Create the Sand Biofilter
The sand bed is 6 metres x 1 metre wide and around 400mm deep.
Excavate the sand bed and add the soil to that already placed around the bed perimeter from when we dug the fish tank earlier.
Slope the Bottom of the sand biofilter.
When considering the excavation (or its alternative) you will need to create a slope in the base of each bed.
Ensure that the bottom of the bed slopes from the inflow end to the drain end – to ensure that all water drains from the sand bed between irrigation events.
A 1:50 slope is recommended – equal to 20mm per meter A 6-metre sand bed will require a slope of 120mm.
When we speak about this slope, we’re referring to the bottom of the sand bed. The surface of the sand in the bed should be very nearly level.
You can build two 3-metre beds if more convenient. A 3-metre sand bed will require a slope of 60mm.
Sandbed Drainage
Once the excavations are complete, make provision for the drain.
Sandbeds must drain completely. ‘Completely’ means no standing water in the bottom of the bed at the completion of the drain cycle.
If water is trapped in the bottom of a sandbed, it can become anaerobic, and we don’t want this.
Not surprisingly, our preferred drain style is the easiest – a simple knife slit in the liner across the width of the bottom of the sand bed at the drain end.
Where this is not convenient, there are other options. Of course, if you’re planning to use any of these, you’ll want to install them prior to adding the sand.
Put the liner in place. Fold the corners neatly and temporarily secure the edges. The Starter sandbed contains around three metric tons of sand, and depending on how well you’ve compacted the base, it may settle a few millimetres.
Fill the sandbed with iAVs-suitable sand.
Give the sandbed a few days to settle and then secure the edges permanently. Paving stones will serve this purpose.
Sandbeds must drain completely. ‘Completely’ means no standing water in the bottom of the bed at the completion of the drain cycle.
If water is trapped in the bottom of a sandbed, it can become anaerobic, and we don’t want this.
Not surprisingly, our preferred drain style is the easiest…a simple knife slit in the liner across the width of the bottom of the sand bed at the drain end.
Where this is not convenient, there are other options. Of course, if you’re planning to use any of these, you’ll want to install them prior to adding the sand.
Earlier, I showed a photo of a square metre sand bed that I built out of treated pine sleepers. The sand biofilters shown below are 2.4m x 1.2m (8′ x 4′). They have a growing surface of around 2.8 metres. They are raised above ground at a good working height for old backs. Raised or sat flat on the ground, these beds can drain into the adjacent sump tank. They were lined with a Duraskrim-style product.


Construction-grade timber can also be used similarly
Building the Carpark iAVs
The Carpark iAVs is our largest design – equal to three Starter iAVs in proportionate terms and productive capability. Our Family iAVs is equal to four Starter iAVs.
And here it is. The schematic says it all.
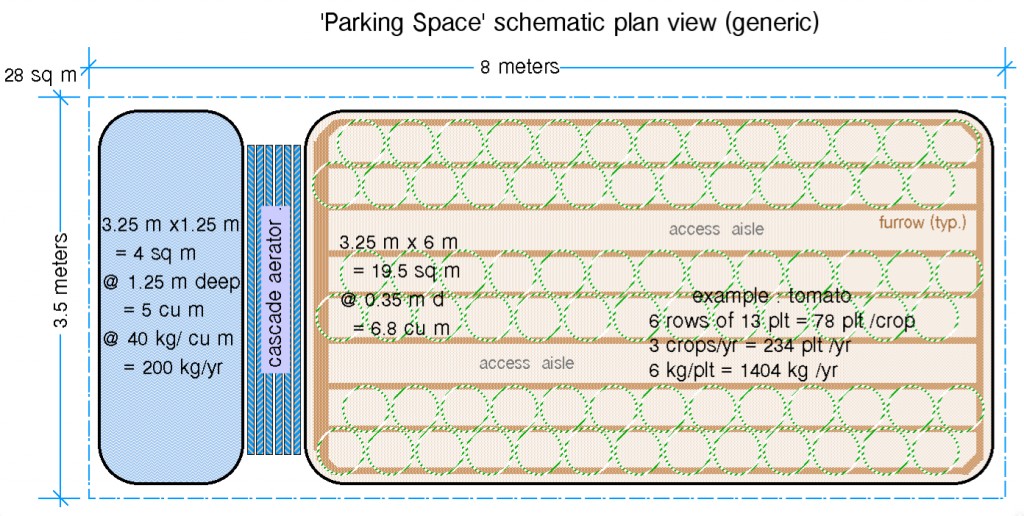
This is a serious home food production system – capable of feeding a family of four – with teenage kids.
You could set it up something like this…
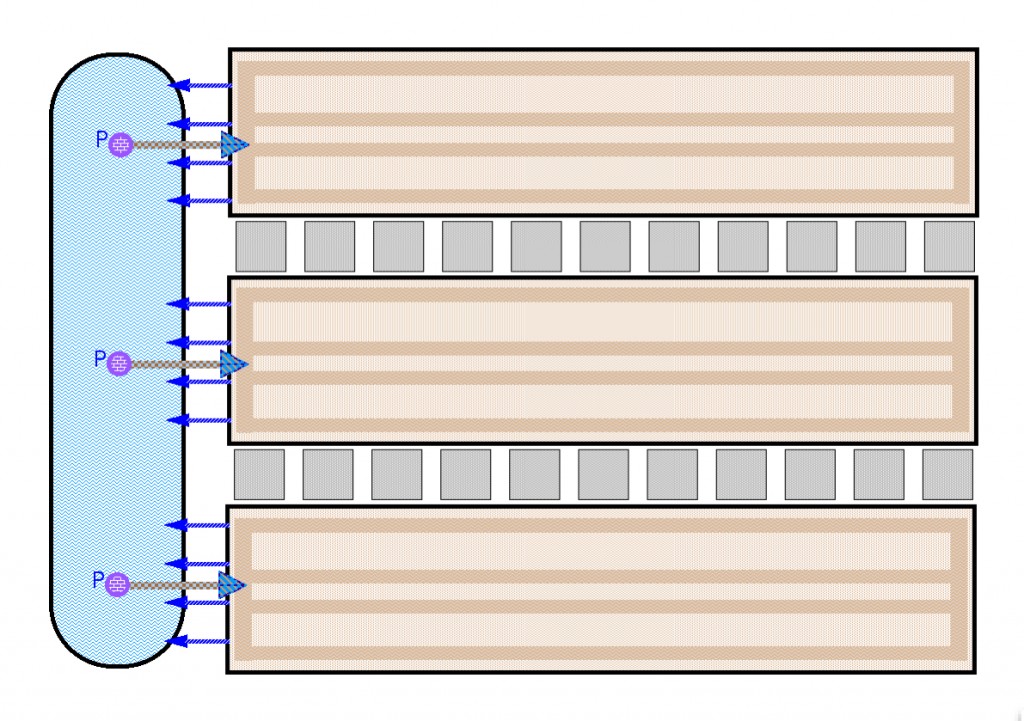
It works like any other iAVs – but it’s the first practical opportunity to demonstrate one large sand biofilter rather than several long rectangular ones.
Here we offer it in its most authentic state.
The Carpark iAVs proposes an in-ground installation…
…and then…
…after which…
Now, for the really important part…
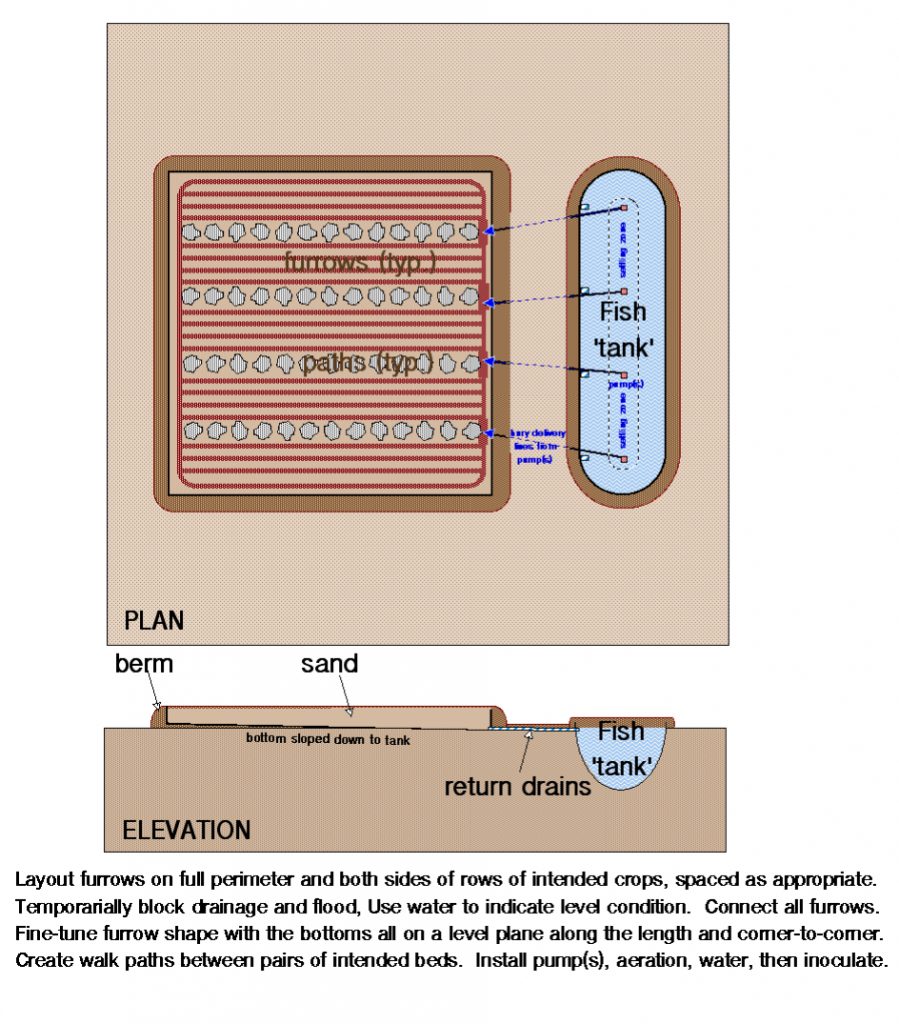
Hook up the Pump and Timer
Attach the hose in the Starter Kit to the pump and place it in the fish tank. Connect the cord on the pump to the recycling digital timer and plug that into the power supply. Temporarily, attach the other end of the hose to the sand bed at the inflow end.
And that’s it. Your new Carpark IAVs build is ready for operation.
Key Points:
- The most cost-effective build is inon-ground…and the preferred layout is that which has the sand beds draining directly back into the fish tank.
- Use construction materials and methods to suit your location.
- All iAVs function in the same way – scalable from one square metre to a million square metres.
-o0o-