Set Up
NOTE: This is probably the most important section in this course.
Sand is the most cost-effective filtration media anywhere!
And therein lies a problem.
You see, if you pour water containing organic matter onto sand, the organics will be trapped on the surface where they will eventually build up to the point where the sand clogs – and the water will no longer drain effectively.
It was only in 1985 that a product design graduate at North Carolina State University finally cracked the code. Mark McMurtry designed the iAVs sand bed so that it could continue to filter fish tank effluent without it clogging – for years.
So, what’s the difference…the secret to its success?
The answer to the successful integration of organics and sand lies in the way in which we set up the sand bed.
As it turns out, Sandgardening succeeds (where all others have failed) because of what we refer to as the ‘architecture’ of sandgardening.
The architecture is a foundation – a framework – that consists of:
- Sand particle size range
- Furrows
- Intermittent irrigation
- Detritus layer
- Gaseous exchange
While there are things in iAVs that we can tweak, the architecture is the ‘secret sauce’ – and you mess with it at your peril.
Sand Particle Size Range
The sand particle size range is what enables a sandgarden to drain effectively while still retaining sufficient moisture to sustain it between irrigation intervals.
If you’ve bought washed and graded filter sand of the correct specification, you’ll have this covered. Similarly, if you’ve tested a batch of sand, and you’re satisfied that it drains effectively, you’re good to go, too.
Now, it’s time to look at how we set up a sandgarden
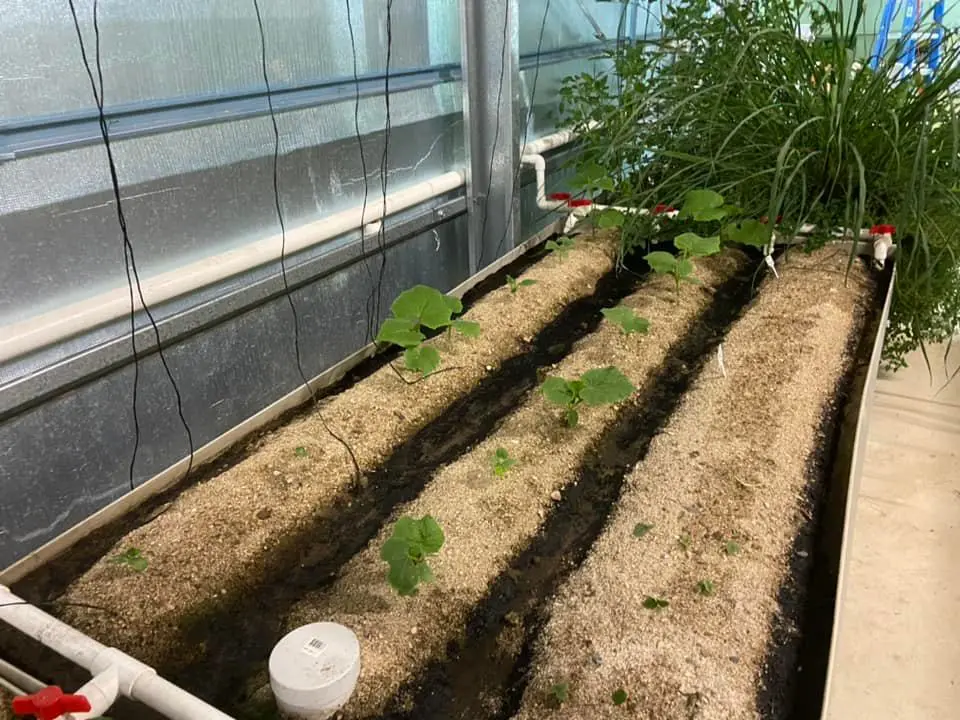
Furrows
In gardening, a furrow is a long, narrow trench.
Furrows play a vital role in iAVs Sandgardens, and we need to understand their purpose and how to make them work effectively.
Furrow Size
Furrows (for the purposes of Sandgardening) are 100 – 150 mm deep. The size and shape of furrows are largely driven by the crops being grown.
In theory, furrows can be as long as your ability to drain them effectively. For practical purposes, however, it is better to keep them to a modest length.
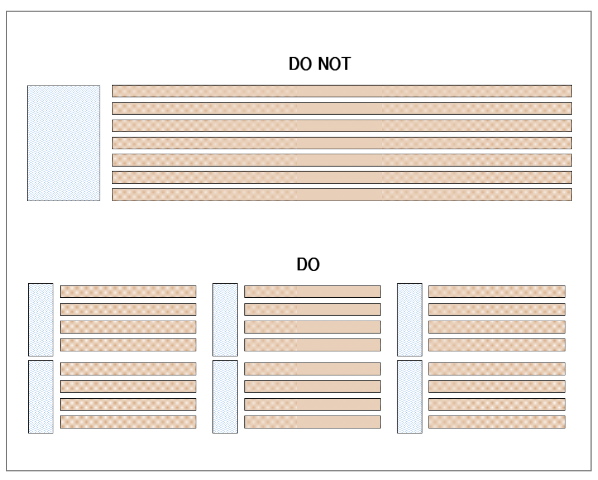
One of the key functions of the furrows is to facilitate the rapid distribution of water around the sand bed – during each intermittent irrigation event.
Intermittent Irrigation Regime
The intermittent irrigation regime is controlled by the timer so that the pump is activated at predetermined intervals – to flood the furrows – to the point of saturation. At this point, the pump stops – and the sand bed begins to drain.
This regime, coupled with the sand particle size range, provides the water and nutrients in a timely manner while ensuring that the sand retains sufficient water – neither too wet nor dry.
Here’s what our intermittent irrigation regime looks like in practice.
- At 6:00 am, the timer triggers the pump, and the nutrient-rich water enters the sand bed and immediately begins to run along the furrows and percolate down through the sand.
- Within seconds, water will begin to flow from the sand bed to drain…back into the water tank.
- After 15 minutes, the water will be at the top of the sand and the pump stops.
- Note: The flow rate must be adjusted so that the water does not reach the base of the plant
- For the next 1 hour and 45 minutes, the bed drains.
- At 8:00 am, the pump starts again, and it runs for 15 minutes – and then stops.
This process is repeated every two hours during the hours of daylight.
NOTE: Each irrigation event should be timed to ensure that one-quarter of the fish tank volume is pumped to the sand biofilter during each irrigation event.
The bed rests overnight – by design.
The Detritus Layer
Each time the pump is activated, the fish waste – comprising fish feces and uneaten food – is pumped up to the sand bed – and into the furrows.
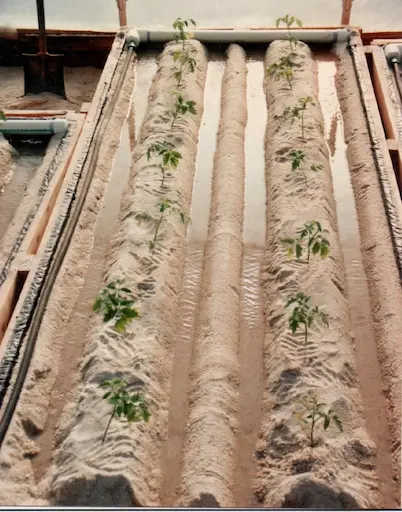
The organic solids in the solution are deposited along the length of the furrows, where they form what is known as the detritus layer – the dark areas in the photo at left.
The intermittent irrigation regime exposes the detritus layer to an ongoing cycle of wetting and drying – exposed to plenty of oxygen – and this accelerates the decomposition of the organic solids…converting them into plant-available nutrients.
Gaseous Exchange
A sandgarden is a bio-machine.
As such, it ‘breathes’ – drawing in fresh air (oxygen) and displacing carbon dioxide – and other unwanted gases.
This gaseous exchange is driven by the intermittent flooding and draining of the sand bed.
The flood cycle vents all the stale air out of the sand bed…and as the water drains, it draws fresh air deep into the bed. This action is not unlike the ‘scavenge effect’ that occurs in an internal combustion engine.
This effect is facilitated by the furrow ridges, which have the effect of chimneys or ventilation stacks.
To summarize, Sandgardening’s “architecture” is central to its ability to grow plants using organic nutrients. Its importance to sandgardening cannot be overstated.
The ‘architecture’ is designed to create the best possible conditions for the soil microbiology in the system. The rhizosphere is the microbial powerhouse that drives a sandgarden.
Of course, our bio-machine has some mechanical parts – to enable us to move the water from the fish tank to the sand beds.
Pumps and Plumbing
While there are various human-powered and electric options, small submersible pond pumps are the most cost-effective and convenient way to raise the water from the fish tank to the sand bed. They come in a range of sizes and prices.
Here are a few examples

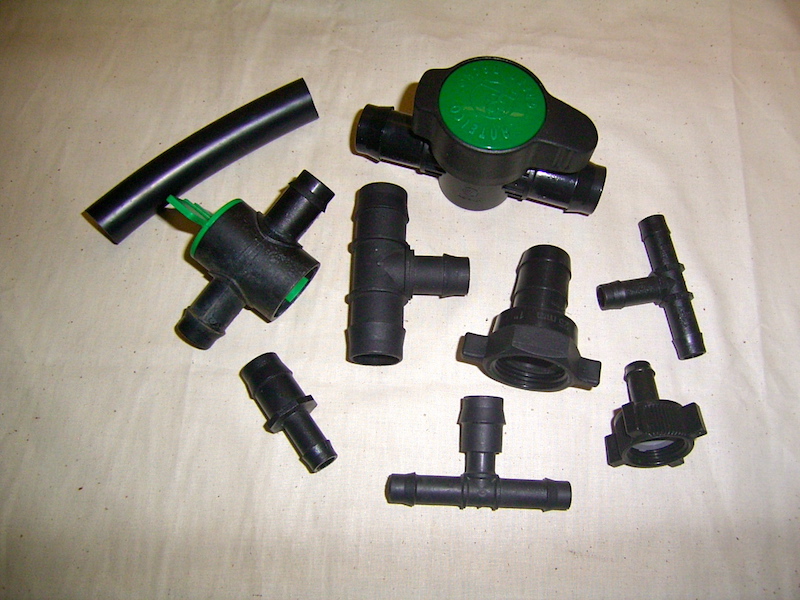
The simple submersible pond pumps that we use will iAVs partner well with black poly micro-irrigation fittings. For our purposes, 20 mm (3/4″) and 25 mm (1″) will be sufficient. A plumbing rig – comprising a water pump, hose and fittings – costs relatively little to put together.
Once we have the means with which to circulate the water, we need to control the duration of the irrigation events – and for that we use timers.
Timers
The best way to control water movement in an iAVs is to use a timer – and the best timers for iAVs purposes are digital recycling timers. While people will often attempt to use electromechanical timers which are set in 15-minute intervals, they vary with the actual interval ranging between twelve and seventeen minutes, so consistent watering can be problematic.
Digital recycling timers, by contrast, are designed to provide short ON/OFF cycles (accurate to the second) at least ten times per day.


The electronic version on the left is rather more compact and costs much less money.
Now, that we’re ready to go, the next thing that we need to do is source some fingerlings and plants.
Key Points
- The setup is the point at which we breathe life into an IAVs so that it becomes a ‘bio machine’ – as we introduce water, organic matter (in the form of fish feed and fish metabolic waste) and some indigenous soil microorganisms.
- The Rhizosphere is the least well-understood aspect of an iAVs – but it is what drives an iAVs and distinguishes it from aquaponics or hydroponics.
- The iAVs ‘architecture’ is sacred. Every iAVs must have furrows, an intermittent irrigation regime, a detritus layer and the capacity for thorough gaseous exchange. Without the right sand particle size range – and those four things – it is NOT an iAVs.
-o0o-